


DJI Osmo Pocket | Beginners Guide
If you are new to using gimbals and looking for a little help getting started with the Osmo Pocket we have put together a few points to get you on your way. In this post we cover what's included in the box all the to firmware upgrades and how to use the many features the Osmo Pocket houses.
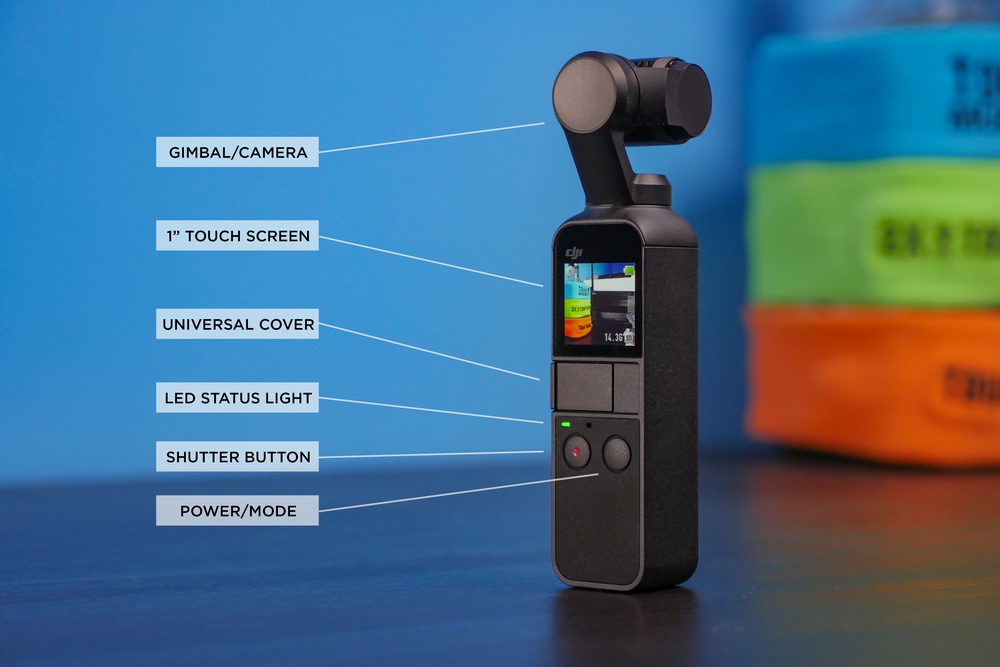
WHATS IN THE BOX
- Osmo Pocket
- Cover
- Smartphone Adapter (Lightning)
- Smartphone Adapter (USB-C)
- Charging Cable
- Wrist Strap

BASIC START GUIDE
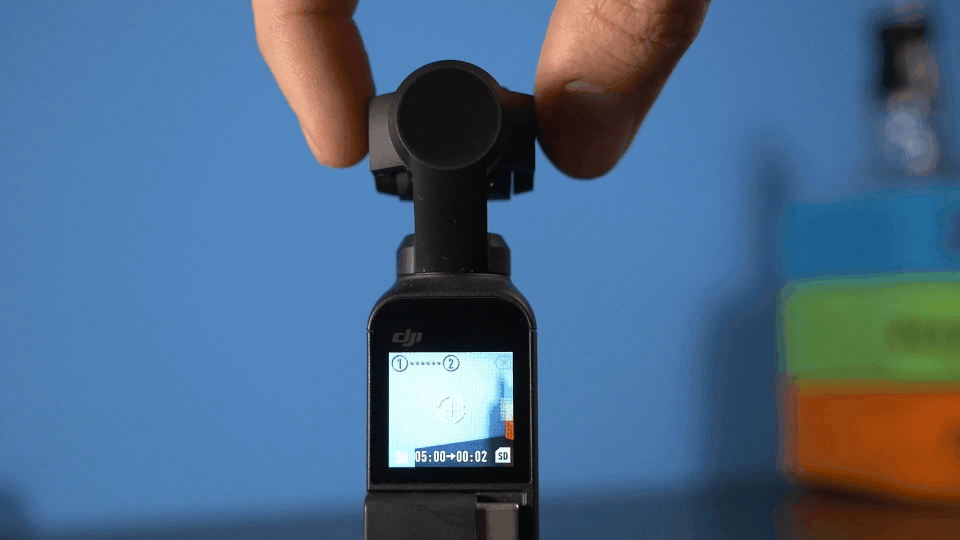
Power on the Osmo Pocket by pressing and holding the power button. Activate and update any firmware that maybe required before using your Osmo. See below for more information. If already Activated you can swipe up on the touch screen to show your shooting options as seen below.
ACTIVATION
Activation is required to bring your DJI Osmo Pocket, and any other products DJI make, to life. It’s a super simple process where you will need to perform a few easy steps.
- Power on the Osmo Pocket.
- Download the DJI Mimo App to your smart device from the Play or App store.
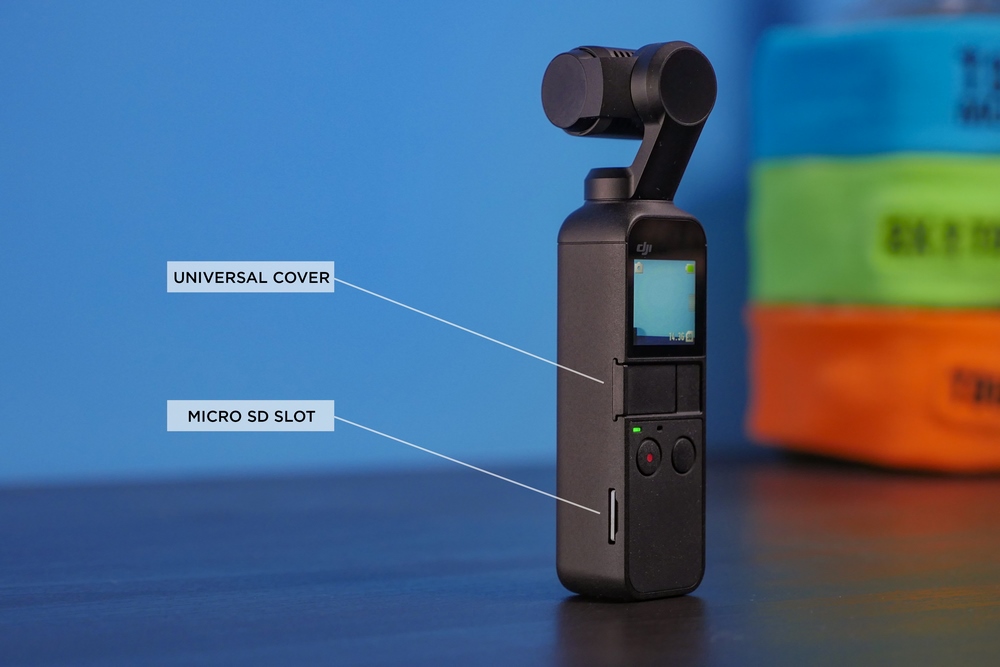
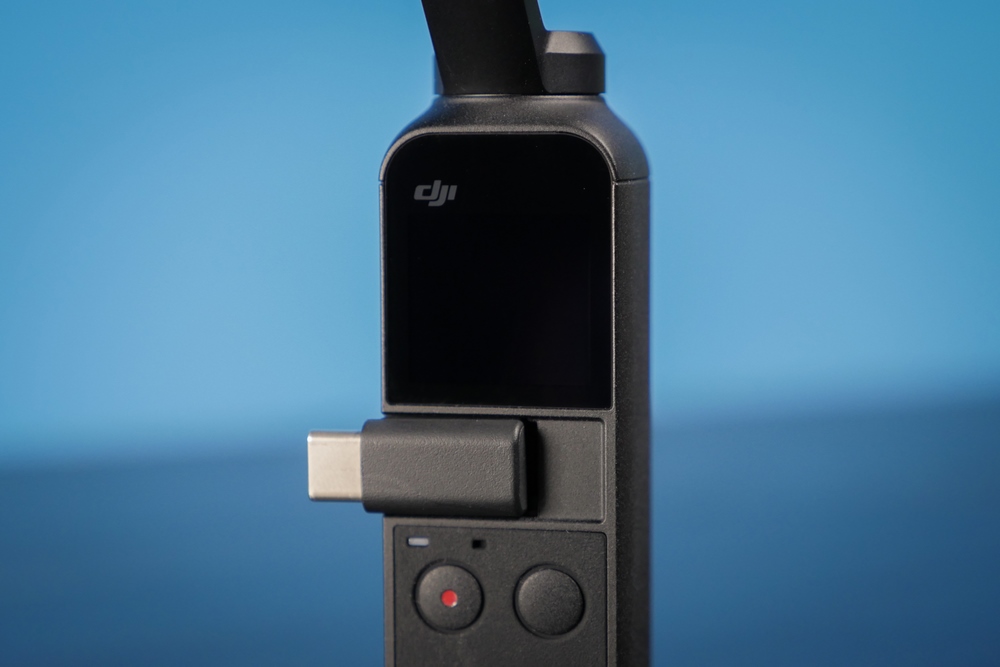
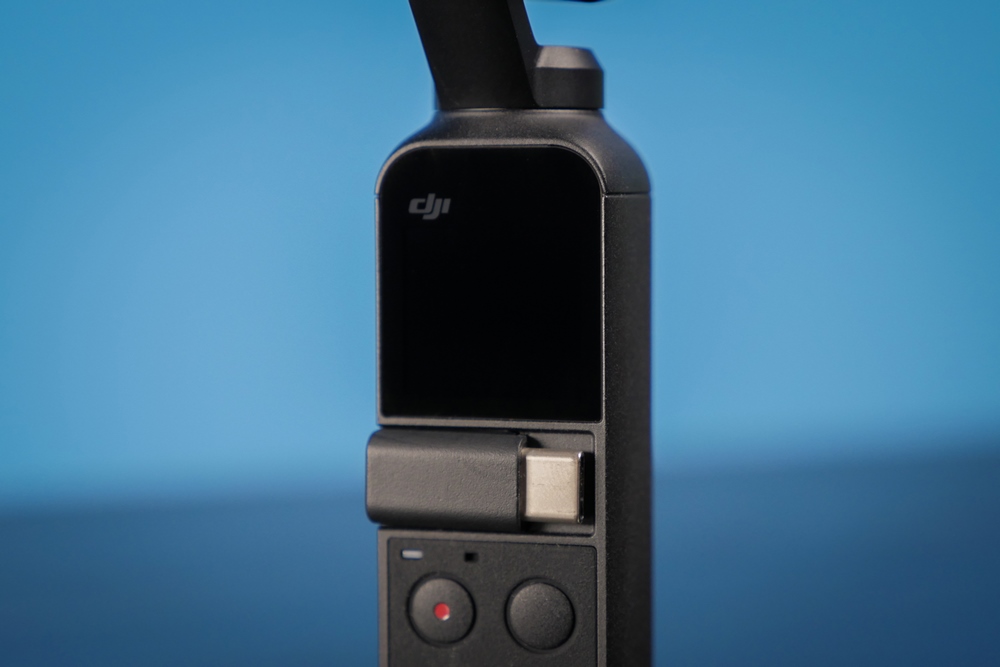
- Remove Osmo’s Universal Cover and insert the correct adapter for your device, USB-C or Lightning.
- Connect the device to the Osmo Pocket via the adapter and the Mimo App with automatically launch. * Note some devices require you to allow the Osmo Pocket to be a trusted device much like when linking your phone to a computer for the first time, see your settings for more information.
- The App will automatically open the Activation Screen – turn on “Upload Device Information” and click “next”.
- At this point DJI Mimo will need to register the Osmo Pocket to your DJI account. Either Sign up or Log In to continue.
- Once logged in confirm the Activation account and tap “Activation” keeping your device connected to the internet.
- Once complete the App will display “Activation Successful” and click “Done” to enter the app.
TIPS – Keep your phone connected to the internet while performing an Activation. Being Logged onto a Wi-Fi network tends to work best. Sometimes Activation can fail on your first few goes, don’t panic, just follow the steps again and you’ll be up and running in no time.
FIRMWARE
When new features or small software bugs are improved DJI will release a firmware for your Osmo Pocket. When you connect your Osmo to your smartphone Mimo will automatically notify you if there is an update.
- Make sure you have at least 100mb free on your microSD card in the Osmo.
- Tap “Download” to download the software package.
- Once downloaded and a “New Firmware Ready to Update” bar will appear.
- Tap this bar to enter the software install section and click “Install”.
- The app will automatically install and update your Osmo Pocket. Note the small LED under the shutter button flashing green and red showing the update is in operation.
- Once at 100% the Osmo Pocket will restart automatically and confirm the update in complete.
DJI MIMO APP ![]()
Mimo is a new dedicated app just for the Osmo Pocket. Within the app you will find many choices and options over just using the Osmo Pocket in a standalone mode.
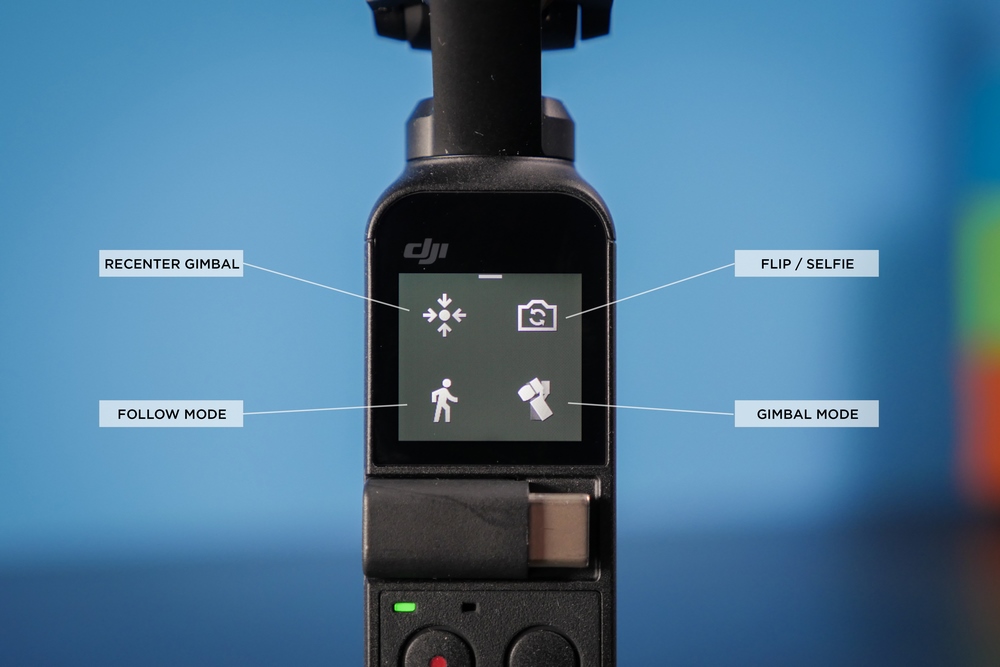
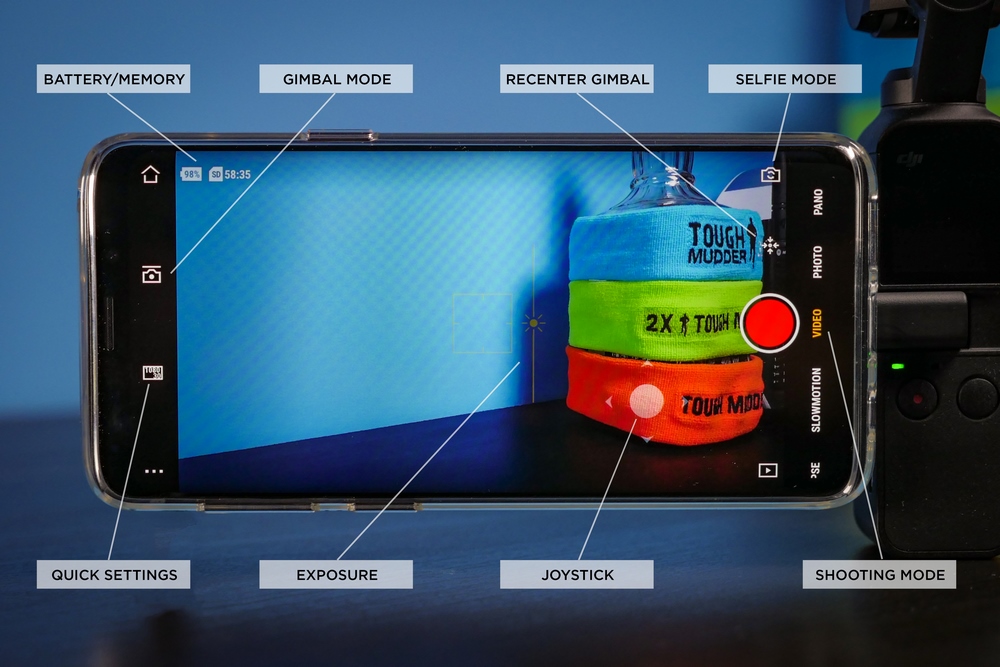
- Gimbal Mode - choose between Follow (fast or slow), Tilt Lock (stops your tilt axis moving) and FPV (the gimbal moves when you roll but keeps your footage stable).
- Recenter Gimbal - tap this icon to bring your camera back to the center point.
- Selfie Mode - spins the camera round to face you.
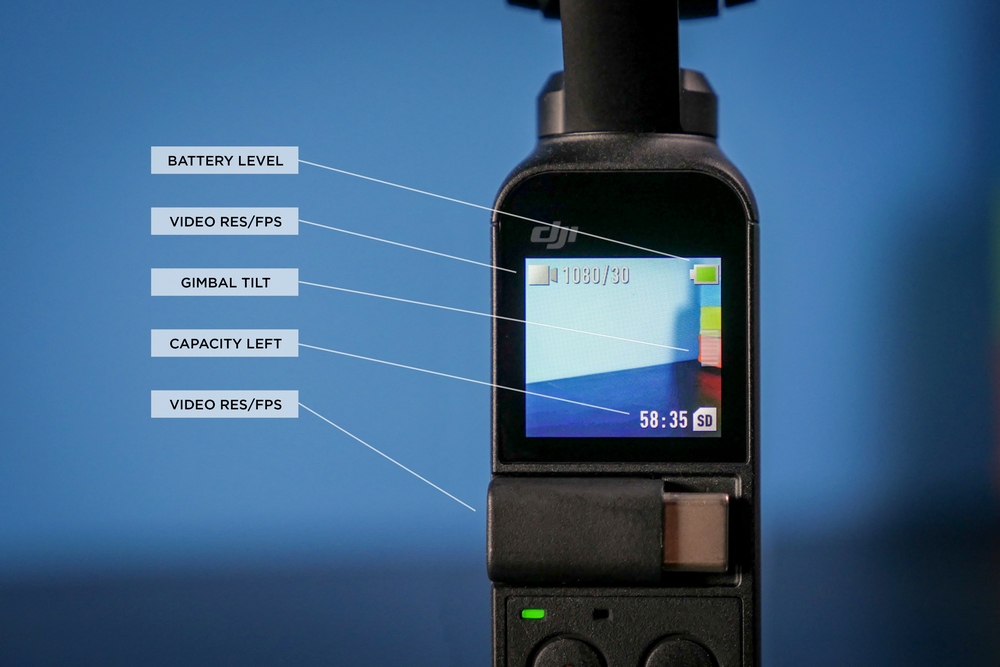
- Quick Settings - change your settings quickly and easily with this icon. Choose your resolution and frames per second.
- Exposure - adjust the brightness of your footage by sliding the sun icon up and down to your chosen level.
- Joy-stick – you can hold and drag the icon for the Joy-stick to move the gimbals head at a constant speed.
- Shooting Mode - scroll up and down to select what mode you want to capture in. Choose from Photo, Video Pano, Timelapse, Slowmotion and more.
- Enter “Pro Mode” via the settings to open up shutter speed selections and more.
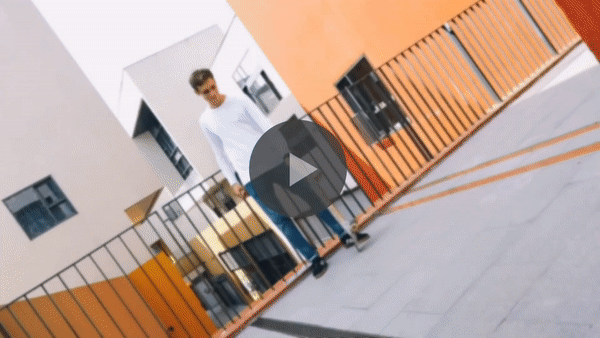
ACTIVETRACK
ActiveTrack leaves you worry free when shooting your subjects and trying to keep them framed. This simple to use feature will follow your subjects no matter how you move your Osmo Pocket.
Two options are available, via the 1” touch screen, Osmo Standalone, or using the smartphone when connected.
VIA OSMO STANDLONE
- Double tap on the touch screen where your subject is. If this is a face Osmo will enter FaceTrack Mode whereas if this is an object Osmo will be in ActiveTrack Mode.
- Press record and Osmo will keep your subject framed no matter where you go.
- Press the function button to cancel out of ActiveTrack Mode.
- Swiping up on the 1” screen will turn the Osmo’s head to face you and automatically enter selfie mode – tracking your face throughout your recording.
VIA SMARTPHONE
- Launch the App and frame your subject by dragging a box over them and Osmo will start following your chosen subject.
TIPS – You don’t just have to use ActiveTrack for a moving subject, it works great too if you are moving towards a statue, monument or building you want to keep in the shot. Use your smartphone to allow more cinematic control over your shots by Active Tracking and changing the composition of your image using the joystick on the App’s screen, keeping you in the shot but not always dead centre.
TIMELASPE
Create high end motion videos of time sped up. In a few simple steps you can choose your recording area and then let Osmo do the rest!
VIA OSMO STANDLONE
- Swipe left on the screen and scroll to “Timelapse” or choose “Motionlapse”.
- Tap the settings at the bottom of the screen to display your Interval and Duration.
- Choose what settings you would like, a smaller interval for shorter time-lapse and vis versa for longer intervals. Then press “Next”.
- For Motionlapse you now gently move the gimbal head to your start position and press the “+” icon on the screen.
- Move to your end position for your Motionlapse and again press the “+” icon.
- When you are ready to begin press the record button and the Osmo will automatically start capturing.
- Once stopped you can play back your lapse by connecting to a smartphone.
TIPS – Keep the Osmo on a flat and stable surface to ensure there is no shake in your Time or Motionlapse. You can get really dynamic shots using Motionlapse in the city at night, capturing all the lights and cars passing you by.
STORY MODE
Want to share your awesome shots but don’t want to spend ages editing a video together? Use Story Mode to take the hassle of creating a short video edit away, leaving you longer to get the shots that count!
- Scroll down on the right side of the screen to select “Story” and check out one of the templates.
- Before choosing you can see a quick demo on your screen then press “Start”.
- You can now get the settings just how you like. Change brightness, style, colours and a whole lot more.
- Press the shutter button to start recording and the gimbal will move on your selected pre-set.
- You can quickly review your shots and if they’re not quite right delete and shoot again.
- Each clip will have the correct background music added.
- After shooting the video will be automatically created in the App where you can save it to your phone a share it straight away.
TIPS – Experiment with multiple angles while shooting from a high position, low on the ground and at a normal portrait height. Try shooting some wide angle and mid shots before picking up on some detail in a close up.
PANO MODE
Use your Osmo Pocket to capture 180° or 3x3 images all automatically aligned and stitched leaving you with a stunning end result!
VIA OSMO STANDLONE
- Swipe left on the screen and scroll down to select “Pano”.
- Swipe left again to choose between 180° or 3x3 photo mode.
- Hold the Osmo Pocket vertically and press the shutter button to begin.
- The gimbal will automatically move position while taking the photos.
- The images will be automatically stitched together.
- After taking your photo connect Osmo to a smartphone using the Mimo App to check out your image.
VIA SMARTPHONE
- Scroll down on the right side of the screen to select “Pano”.
- Tap the quick settings button on the left to choose between 180° or 3x3 photo mode.
- Press the shutter button and wait for the gimbal to automatically position itself while taking photos.
- The images are automatically stitched together and available in playback.

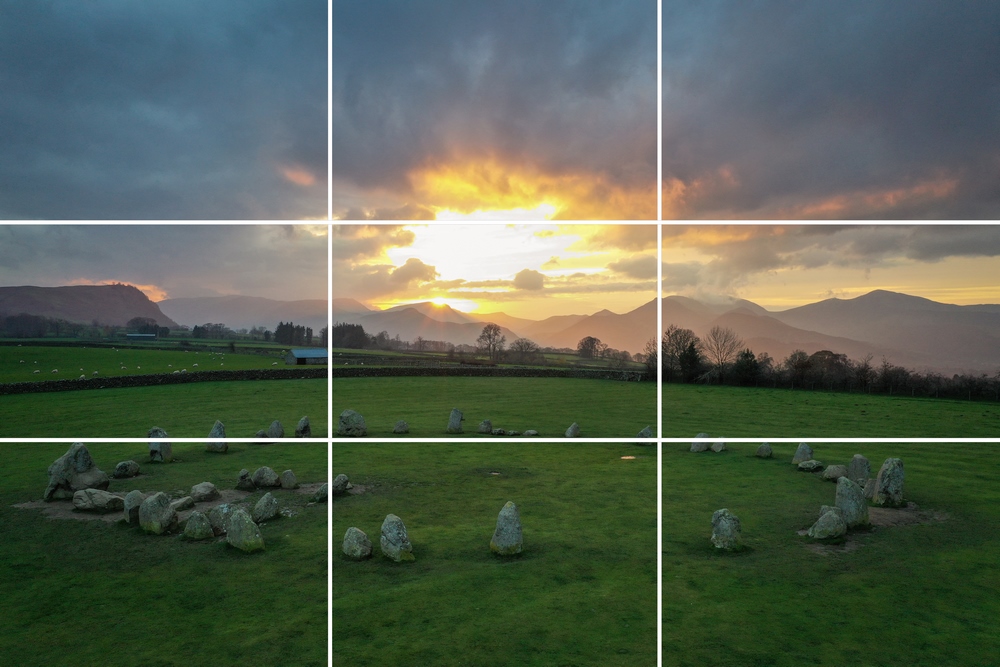

TIPS – Keep the Osmo Pocket as vertical as possible when using Pano Mode. 3x3 is great for when you want more detail in your shots giving you a larger image at the end, perfect for landscapes and those epic cityscapes.
PACKING UP
If like me you choose to use your Osmo Pocket connected to your smartphone more than as a standalone unit, DJI has taken this into consideration and created a few helpful features.
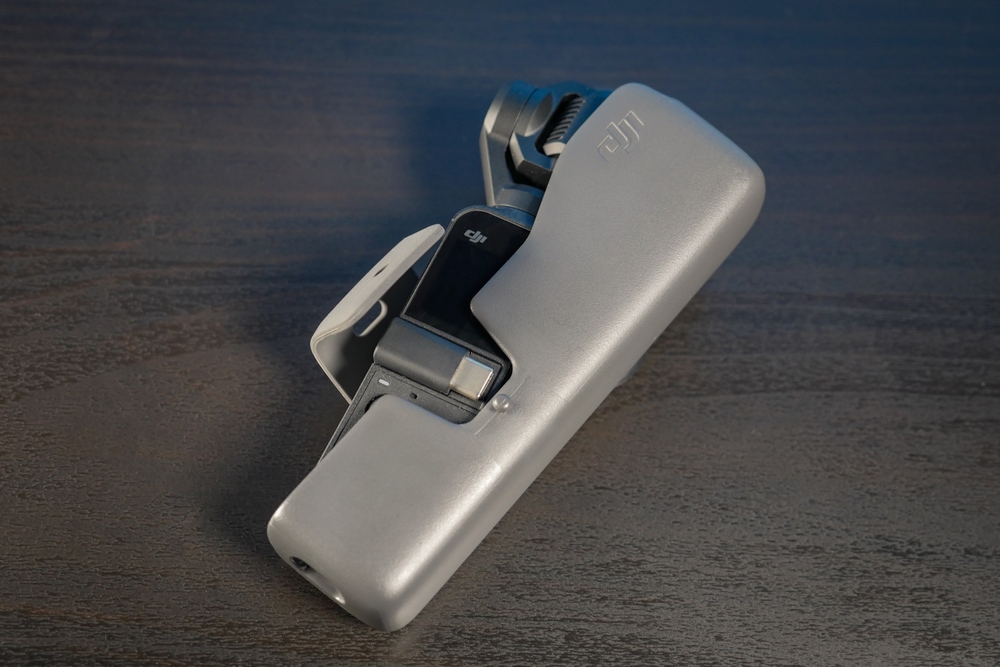
You can remove the Smartphone adapter and turn it around so it is always attached and making it harder to lose. This also fits into the Cover keeping your Osmo protected when not in use too. Along with this when you power off your Osmo the gimbal head automatically positions itself in the correct alignment to pop straight into the Cover. The Cover also has a hole in the base so you can charge your Osmo while still being protected.


About Us
Complaints Procedure
Delivery Info
Employee-owned company
Modern Slavery Statement
Official Orders
Privacy Statement
Security
Support and Returns
Terms and conditions
Vulnerable Consumer Policy
WEEE Policy
Finance
Landing Pages
Banner Promotions
Interest Free Promotions
Cash Back Promotions
Black Friday Deals
LCE Newsletter
We Buy Cameras
New Equipment
Secondhand
All New Equipment
All Secondhand
All New Trade In
All New Categories
